-
District of Columbia War Memorial [01]
![District of Columbia War Memorial [01] (1641 visits) The District of Columbia War Memorial, on the National Mall in Washington, DC.
Ben Schumin is a pro... District of Columbia War Memorial [01]](../../../i/upload/2024/07/13/20240713230603-9d9addb8-cu_s9999x250.jpg)
-
Anti-Nazi protest [11]
![Anti-Nazi protest [11] (9512 visits) A row of Capitol Police officers in riot gear forms a boundary between the counter-protesters and th... Anti-Nazi protest [11]](../../../i/upload/2024/07/15/20240715214437-fbcf0587-cu_s9999x250.jpg)
-
Anti-Nazi protest [10]
![Anti-Nazi protest [10] (3940 visits) A masked woman takes a photo at a demonstration on April 19, 2008 in Washington, DC where mostly lef... Anti-Nazi protest [10]](../../../i/upload/2024/07/15/20240715214439-63d920de-cu_s9999x250.jpg)
-
Anti-Nazi protest [09]
![Anti-Nazi protest [09] (9318 visits) Demonstrators protest a neo-Nazi demonstration on the Capitol grounds on April 19, 2008 in Washingto... Anti-Nazi protest [09]](../../../i/upload/2024/07/15/20240715214441-eb6c3d6e-cu_s9999x250.jpg)
-
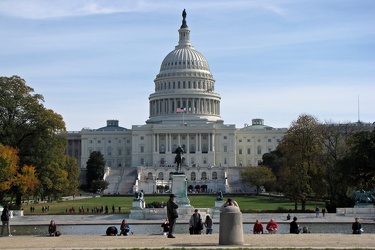
United States Capitol from the National Mall
-
Washington Monument in scaffolding, viewed from a field west of 15th Street SW [01]
![Washington Monument in scaffolding, viewed from a field west of 15th Street SW [01] (3588 visits) The Washington Monument, a stone obelisk erected to commemorate President George Washington, was clo... Washington Monument in scaffolding, viewed from a field west of 15th Street SW [01]](../../../i/upload/2024/07/17/20240717161954-a645a742-cu_s9999x250.jpg)
-
Washington Monument in scaffolding, viewed from a field west of 15th Street SW [02]
![Washington Monument in scaffolding, viewed from a field west of 15th Street SW [02] (3496 visits) The Washington Monument, a stone obelisk erected to commemorate President George Washington, was clo... Washington Monument in scaffolding, viewed from a field west of 15th Street SW [02]](../../../i/upload/2024/07/17/20240717161957-eaefa38c-cu_s9999x250.jpg)
-
Washington Monument in scaffolding, viewed from the southwest [01]
![Washington Monument in scaffolding, viewed from the southwest [01] (2954 visits) The Washington Monument, a stone obelisk erected to commemorate President George Washington, was clo... Washington Monument in scaffolding, viewed from the southwest [01]](../../../i/upload/2024/07/17/20240717162040-a816357e-cu_s9999x250.jpg)
-
Washington Monument in scaffolding, viewed from the southwest [02]
![Washington Monument in scaffolding, viewed from the southwest [02] (2659 visits) The Washington Monument, a stone obelisk erected to commemorate President George Washington, was clo... Washington Monument in scaffolding, viewed from the southwest [02]](../../../i/upload/2024/07/17/20240717162045-4adfa69d-cu_s9999x250.jpg)
-
Washington Monument in scaffolding, viewed from the southwest [03]
![Washington Monument in scaffolding, viewed from the southwest [03] (2549 visits) The Washington Monument, a stone obelisk erected to commemorate President George Washington, was clo... Washington Monument in scaffolding, viewed from the southwest [03]](../../../i/upload/2024/07/17/20240717162048-de074947-cu_s9999x250.jpg)
-
Washington Monument in scaffolding, viewed from the southwest [04]
![Washington Monument in scaffolding, viewed from the southwest [04] (3290 visits) The Washington Monument, a stone obelisk erected to commemorate President George Washington, was clo... Washington Monument in scaffolding, viewed from the southwest [04]](../../../i/upload/2024/07/17/20240717162051-682e904a-cu_s9999x250.jpg)
-
Washington Monument in scaffolding, viewed from the southeast [01]
![Washington Monument in scaffolding, viewed from the southeast [01] (3222 visits) The Washington Monument, a stone obelisk erected to commemorate President George Washington, was clo... Washington Monument in scaffolding, viewed from the southeast [01]](../../../i/upload/2024/07/17/20240717162054-edb5ac0f-cu_s9999x250.jpg)
-
Washington Monument in scaffolding, viewed from the southeast [02]
![Washington Monument in scaffolding, viewed from the southeast [02] (3311 visits) The Washington Monument, a stone obelisk erected to commemorate President George Washington, was clo... Washington Monument in scaffolding, viewed from the southeast [02]](../../../i/upload/2024/07/17/20240717162056-e1f94bec-cu_s9999x250.jpg)
-
Washington Monument in scaffolding, viewed from the southeast [03]
![Washington Monument in scaffolding, viewed from the southeast [03] (3824 visits) The Washington Monument, a stone obelisk erected to commemorate President George Washington, was clo... Washington Monument in scaffolding, viewed from the southeast [03]](../../../i/upload/2024/07/17/20240717162059-d67ffec0-cu_s9999x250.jpg)
-
Washington Monument in scaffolding, viewed from the southeast [04]
![Washington Monument in scaffolding, viewed from the southeast [04] (4516 visits) The Washington Monument, a stone obelisk erected to commemorate President George Washington, was clo... Washington Monument in scaffolding, viewed from the southeast [04]](../../../i/upload/2024/07/17/20240717162102-f639141e-cu_s9999x250.jpg)
-
Base of the Washington Monument in scaffolding, viewed from the southwest [01]
![Base of the Washington Monument in scaffolding, viewed from the southwest [01] (2168 visits) The Washington Monument, a stone obelisk erected to commemorate President George Washington, was clo... Base of the Washington Monument in scaffolding, viewed from the southwest [01]](../../../i/upload/2024/07/17/20240717162110-6003aec3-cu_s9999x250.jpg)
-
Base of the Washington Monument in scaffolding, viewed from the southwest [02]
![Base of the Washington Monument in scaffolding, viewed from the southwest [02] (1987 visits) The Washington Monument, a stone obelisk erected to commemorate President George Washington, was clo... Base of the Washington Monument in scaffolding, viewed from the southwest [02]](../../../i/upload/2024/07/17/20240717162113-c0c786ab-cu_s9999x250.jpg)
-
Base of the Washington Monument in scaffolding, viewed from the southwest [03]
![Base of the Washington Monument in scaffolding, viewed from the southwest [03] (1953 visits) The Washington Monument, a stone obelisk erected to commemorate President George Washington, was clo... Base of the Washington Monument in scaffolding, viewed from the southwest [03]](../../../i/upload/2024/07/17/20240717162116-3eda0214-cu_s9999x250.jpg)
-
Base of the Washington Monument in scaffolding, viewed from the southeast [01]
![Base of the Washington Monument in scaffolding, viewed from the southeast [01] (2545 visits) The Washington Monument, a stone obelisk erected to commemorate President George Washington, was clo... Base of the Washington Monument in scaffolding, viewed from the southeast [01]](../../../i/upload/2024/07/17/20240717162119-9fed4d23-cu_s9999x250.jpg)
-
Base of the Washington Monument in scaffolding, viewed from the southeast [02]
![Base of the Washington Monument in scaffolding, viewed from the southeast [02] (2035 visits) The Washington Monument, a stone obelisk erected to commemorate President George Washington, was clo... Base of the Washington Monument in scaffolding, viewed from the southeast [02]](../../../i/upload/2024/07/17/20240717162122-68e67036-cu_s9999x250.jpg)
-
Detail of the Washington Monument's scaffolding, viewed from the southwest [01]
![Detail of the Washington Monument's scaffolding, viewed from the southwest [01] (2120 visits) The Washington Monument, a stone obelisk erected to commemorate President George Washington, was clo... Detail of the Washington Monument's scaffolding, viewed from the southwest [01]](../../../i/upload/2024/07/17/20240717162127-e8e4c500-cu_s9999x250.jpg)
-
Detail of the Washington Monument's scaffolding, viewed from the southwest, showing the elevator car [01]
![Detail of the Washington Monument's scaffolding, viewed from the southwest, showing the elevator car [01] (2913 visits) The Washington Monument, a stone obelisk erected to commemorate President George Washington, was clo... Detail of the Washington Monument's scaffolding, viewed from the southwest, showing the elevator car [01]](../../../i/upload/2024/07/17/20240717162135-3a1fcbfb-cu_s9999x250.jpg)
-
Detail of the Washington Monument's scaffolding, viewed from the southwest, showing the elevator car [02]
![Detail of the Washington Monument's scaffolding, viewed from the southwest, showing the elevator car [02] (3190 visits) The Washington Monument, a stone obelisk erected to commemorate President George Washington, was clo... Detail of the Washington Monument's scaffolding, viewed from the southwest, showing the elevator car [02]](../../../i/upload/2024/07/17/20240717162137-e6d3cce8-cu_s9999x250.jpg)
-
Detail of the Washington Monument's scaffolding, viewed from the southwest, showing the elevator car [03]
![Detail of the Washington Monument's scaffolding, viewed from the southwest, showing the elevator car [03] (3098 visits) The Washington Monument, a stone obelisk erected to commemorate President George Washington, was clo... Detail of the Washington Monument's scaffolding, viewed from the southwest, showing the elevator car [03]](../../../i/upload/2024/07/17/20240717162140-b66bbabb-cu_s9999x250.jpg)
-
Detail of the Washington Monument's scaffolding, viewed from the southwest [02]
![Detail of the Washington Monument's scaffolding, viewed from the southwest [02] (2593 visits) The Washington Monument, a stone obelisk erected to commemorate President George Washington, was clo... Detail of the Washington Monument's scaffolding, viewed from the southwest [02]](../../../i/upload/2024/07/17/20240717162148-c6ccb166-cu_s9999x250.jpg)
-
Detail of the Washington Monument's scaffolding, viewed from the south [01]
![Detail of the Washington Monument's scaffolding, viewed from the south [01] (2501 visits) The Washington Monument, a stone obelisk erected to commemorate President George Washington, was clo... Detail of the Washington Monument's scaffolding, viewed from the south [01]](../../../i/upload/2024/07/17/20240717162151-fdc2434b-cu_s9999x250.jpg)
-
Detail of the Washington Monument's scaffolding, viewed from the south [02]
![Detail of the Washington Monument's scaffolding, viewed from the south [02] (2279 visits) The Washington Monument, a stone obelisk erected to commemorate President George Washington, was clo... Detail of the Washington Monument's scaffolding, viewed from the south [02]](../../../i/upload/2024/07/17/20240717162154-8d23a49f-cu_s9999x250.jpg)
-
Detail of the Washington Monument's scaffolding, viewed from the south [03]
![Detail of the Washington Monument's scaffolding, viewed from the south [03] (2470 visits) The Washington Monument, a stone obelisk erected to commemorate President George Washington, was clo... Detail of the Washington Monument's scaffolding, viewed from the south [03]](../../../i/upload/2024/07/17/20240717162156-dfbfddb6-cu_s9999x250.jpg)
-
Detail of the Washington Monument's scaffolding, viewed from the south [04]
![Detail of the Washington Monument's scaffolding, viewed from the south [04] (2298 visits) The Washington Monument, a stone obelisk erected to commemorate President George Washington, was clo... Detail of the Washington Monument's scaffolding, viewed from the south [04]](../../../i/upload/2024/07/17/20240717162159-b7fb59d6-cu_s9999x250.jpg)
-
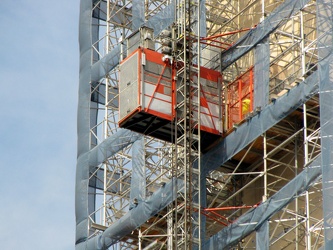
Detail of the Washington Monument's scaffolding, viewed from the southeast, showing the elevator car
-
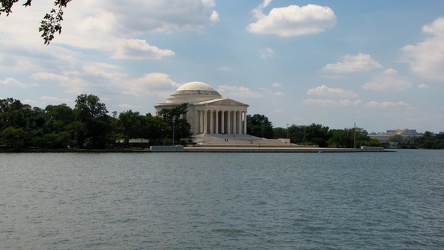
Jefferson Memorial from across the Tidal Basin
-
Washington Monument in scaffolding, viewed from the northeast [02]
![Washington Monument in scaffolding, viewed from the northeast [02] (1455 visits) The Washington Monument, a stone obelisk erected to commemorate President George Washington, was clo... Washington Monument in scaffolding, viewed from the northeast [02]](../../../i/upload/2024/07/17/20240717162239-80ecebdd-cu_s9999x250.jpg)
-
Washington Monument in scaffolding at night, viewed from the southwest, across the Tidal Basin [01]
![Washington Monument in scaffolding at night, viewed from the southwest, across the Tidal Basin [01] (2535 visits) The Washington Monument, a stone obelisk erected to commemorate President George Washington, was clo... Washington Monument in scaffolding at night, viewed from the southwest, across the Tidal Basin [01]](../../../i/upload/2024/07/17/20240717165825-4f489be4-cu_s9999x250.jpg)
-
Washington Monument in scaffolding at night, viewed from the southwest, across the Tidal Basin [02]
![Washington Monument in scaffolding at night, viewed from the southwest, across the Tidal Basin [02] (2314 visits) The Washington Monument, a stone obelisk erected to commemorate President George Washington, was clo... Washington Monument in scaffolding at night, viewed from the southwest, across the Tidal Basin [02]](../../../i/upload/2024/07/17/20240717165829-8f19089c-cu_s9999x250.jpg)
-
Washington Monument in scaffolding at night, viewed from the southeast [01]
![Washington Monument in scaffolding at night, viewed from the southeast [01] (2346 visits) The Washington Monument, a stone obelisk erected to commemorate President George Washington, was clo... Washington Monument in scaffolding at night, viewed from the southeast [01]](../../../i/upload/2024/07/17/20240717165849-7e3d0d52-cu_s9999x250.jpg)
-
Washington Monument in scaffolding at night, viewed from the south, across the Tidal Basin [01]
![Washington Monument in scaffolding at night, viewed from the south, across the Tidal Basin [01] (2498 visits) The Washington Monument, a stone obelisk erected to commemorate President George Washington, was clo... Washington Monument in scaffolding at night, viewed from the south, across the Tidal Basin [01]](../../../i/upload/2024/07/17/20240717165852-e025de57-cu_s9999x250.jpg)
-
Washington Monument in scaffolding at night, viewed from the south, across the Tidal Basin [02]
![Washington Monument in scaffolding at night, viewed from the south, across the Tidal Basin [02] (1975 visits) The Washington Monument, a stone obelisk erected to commemorate President George Washington, was clo... Washington Monument in scaffolding at night, viewed from the south, across the Tidal Basin [02]](../../../i/upload/2024/07/17/20240717165859-5fc48e43-cu_s9999x250.jpg)
-
Washington Monument in scaffolding at night, viewed from the south, across the Tidal Basin [03]
![Washington Monument in scaffolding at night, viewed from the south, across the Tidal Basin [03] (2884 visits) The Washington Monument, a stone obelisk erected to commemorate President George Washington, was clo... Washington Monument in scaffolding at night, viewed from the south, across the Tidal Basin [03]](../../../i/upload/2024/07/17/20240717165902-9583fa1d-cu_s9999x250.jpg)
-
Washington Monument in scaffolding at night, viewed from the south, across the Tidal Basin [04]
![Washington Monument in scaffolding at night, viewed from the south, across the Tidal Basin [04] (2668 visits) The Washington Monument, a stone obelisk erected to commemorate President George Washington, was clo... Washington Monument in scaffolding at night, viewed from the south, across the Tidal Basin [04]](../../../i/upload/2024/07/17/20240717165904-9847e3cc-cu_s9999x250.jpg)
-
Washington Monument in scaffolding at night, viewed from the south, across the Tidal Basin [05]
![Washington Monument in scaffolding at night, viewed from the south, across the Tidal Basin [05] (2031 visits) The Washington Monument, a stone obelisk erected to commemorate President George Washington, was clo... Washington Monument in scaffolding at night, viewed from the south, across the Tidal Basin [05]](../../../i/upload/2024/07/17/20240717165913-d7f7ba07-cu_s9999x250.jpg)
-
Washington Monument in scaffolding at night, viewed from the southwest, across the Tidal Basin [03]
![Washington Monument in scaffolding at night, viewed from the southwest, across the Tidal Basin [03] (2559 visits) The Washington Monument, a stone obelisk erected to commemorate President George Washington, was clo... Washington Monument in scaffolding at night, viewed from the southwest, across the Tidal Basin [03]](../../../i/upload/2024/07/17/20240717165917-eb9e49eb-cu_s9999x250.jpg)
-
Washington Monument in scaffolding at night, viewed from the southwest, across the Tidal Basin [04]
![Washington Monument in scaffolding at night, viewed from the southwest, across the Tidal Basin [04] (5166 visits) The Washington Monument, a stone obelisk erected to commemorate President George Washington, was clo... Washington Monument in scaffolding at night, viewed from the southwest, across the Tidal Basin [04]](../../../i/upload/2024/07/17/20240717165920-c090e746-cu_s9999x250.jpg)
-
Washington Monument in scaffolding at night, viewed from the southeast [02]
![Washington Monument in scaffolding at night, viewed from the southeast [02] (3098 visits) The Washington Monument, a stone obelisk erected to commemorate President George Washington, was clo... Washington Monument in scaffolding at night, viewed from the southeast [02]](../../../i/upload/2024/07/17/20240717165949-7270b6c7-cu_s9999x250.jpg)
-
Washington Monument in scaffolding at night, viewed from the southwest [01]
![Washington Monument in scaffolding at night, viewed from the southwest [01] (6948 visits) The Washington Monument, a stone obelisk erected to commemorate President George Washington, was clo... Washington Monument in scaffolding at night, viewed from the southwest [01]](../../../i/upload/2024/07/17/20240717165954-0afd4743-cu_s9999x250.jpg)
-
Washington Monument in scaffolding at night, viewed from the southeast [02]
![Washington Monument in scaffolding at night, viewed from the southeast [02] (2473 visits) The Washington Monument, a stone obelisk erected to commemorate President George Washington, was clo... Washington Monument in scaffolding at night, viewed from the southeast [02]](../../../i/upload/2024/07/17/20240717170012-9dd24af5-cu_s9999x250.jpg)
-
Washington Monument in scaffolding at night, viewed from the southwest [02]
![Washington Monument in scaffolding at night, viewed from the southwest [02] (2835 visits) The Washington Monument, a stone obelisk erected to commemorate President George Washington, was clo... Washington Monument in scaffolding at night, viewed from the southwest [02]](../../../i/upload/2024/07/17/20240717170028-96fc368d-cu_s9999x250.jpg)
-
Jefferson Memorial from across the Tidal Basin [01]
![Jefferson Memorial from across the Tidal Basin [01] (1744 visits) The Jefferson Memorial, viewed from across the Tidal Basin, near the Martin Luther King, Jr. Memoria... Jefferson Memorial from across the Tidal Basin [01]](../../../i/upload/2024/07/17/20240717170037-e2ce065d-cu_s9999x250.jpg)
-
Jefferson Memorial from across the Tidal Basin [02]
![Jefferson Memorial from across the Tidal Basin [02] (1494 visits) The Jefferson Memorial, viewed from Maine Avenue SW, across the Tidal Basin from the memorial itself... Jefferson Memorial from across the Tidal Basin [02]](../../../i/upload/2024/07/17/20240717170040-d8bbe7ff-cu_s9999x250.jpg)
-
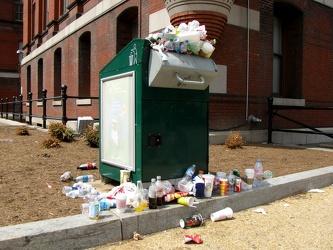
Overflowing solar compactor trash can
-
Road flare on Maine Avenue SW [01]
![Road flare on Maine Avenue SW [01] (1592 visits) A road flare burns in the rightmost lane of Maine Avenue SW during the National Cherry Blossom Festi... Road flare on Maine Avenue SW [01]](../../../i/upload/2024/07/17/20240717225356-2886a729-cu_s9999x250.jpg)
-
Road flare on Maine Avenue SW [02]
![Road flare on Maine Avenue SW [02] (1572 visits) A road flare burns in the rightmost lane of Maine Avenue SW during the National Cherry Blossom Festi... Road flare on Maine Avenue SW [02]](../../../i/upload/2024/07/17/20240717225359-e216a1f4-cu_s9999x250.jpg)
-
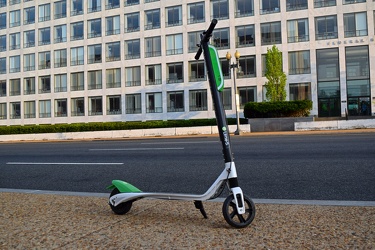
Lime Scooter
-
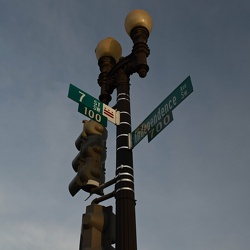
7th Street and Independence Avenue SW
-
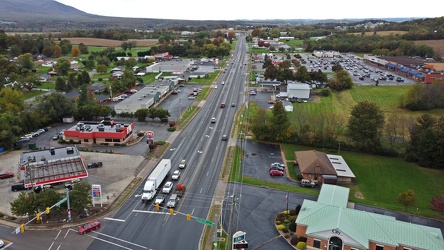
US 340 south in Stuarts Draft
-
Afton Mountain, viewed from Rockfish Gap [01]
![Afton Mountain, viewed from Rockfish Gap [01] (11649 visits) Afton Mountain, part of the Blue Ridge Mountains, viewed from above Rockfish Gap.
More at The Schum... Afton Mountain, viewed from Rockfish Gap [01]](../../../i/upload/2024/07/20/20240720111734-45b6cd77-cu_s9999x250.jpg)
-
Afton Mountain, viewed from Rockfish Gap [02]
![Afton Mountain, viewed from Rockfish Gap [02] (11560 visits) Afton Mountain, part of the Blue Ridge Mountains, viewed from above Rockfish Gap.
More at The Schum... Afton Mountain, viewed from Rockfish Gap [02]](../../../i/upload/2024/07/20/20240720111739-8e9f0558-cu_s9999x250.jpg)
-
Controlled burn at Awendaw Savanna [01]
![Controlled burn at Awendaw Savanna [01] (735 visits) Aerial view of a controlled burn at Awendaw Savanna, located near McClellanville, South Carolina.
... Controlled burn at Awendaw Savanna [01]](../../../i/upload/2025/01/15/20250115001851-ef0bbae9-cu_s9999x250.jpg)
-
Controlled burn at Awendaw Savanna [02]
![Controlled burn at Awendaw Savanna [02] (739 visits) Aerial view of a controlled burn at Awendaw Savanna, located near McClellanville, South Carolina.
... Controlled burn at Awendaw Savanna [02]](../../../i/upload/2025/01/15/20250115001904-4206ce4c-cu_s9999x250.jpg)
-
Controlled burn at Awendaw Savanna [03]
![Controlled burn at Awendaw Savanna [03] (744 visits) Aerial view of a controlled burn at Awendaw Savanna, located near McClellanville, South Carolina.
... Controlled burn at Awendaw Savanna [03]](../../../i/upload/2025/01/15/20250115001911-3cf2c7e5-cu_s9999x250.jpg)
-
Controlled burn at Awendaw Savanna [04]
![Controlled burn at Awendaw Savanna [04] (748 visits) Aerial view of a controlled burn at Awendaw Savanna, located near McClellanville, South Carolina.
... Controlled burn at Awendaw Savanna [04]](../../../i/upload/2025/01/15/20250115001917-b4d868ee-cu_s9999x250.jpg)
-
Controlled burn at Awendaw Savanna [05]
![Controlled burn at Awendaw Savanna [05] (728 visits) Aerial view of a controlled burn at Awendaw Savanna, located near McClellanville, South Carolina.
... Controlled burn at Awendaw Savanna [05]](../../../i/upload/2025/01/15/20250115001923-4d921d31-cu_s9999x250.jpg)
-
Controlled burn at Awendaw Savanna [06]
![Controlled burn at Awendaw Savanna [06] (747 visits) Aerial view of a controlled burn at Awendaw Savanna, located near McClellanville, South Carolina.
... Controlled burn at Awendaw Savanna [06]](../../../i/upload/2025/01/15/20250115001930-f2a0840d-cu_s9999x250.jpg)
-
Controlled burn at Awendaw Savanna [07]
![Controlled burn at Awendaw Savanna [07] (722 visits) Aerial view of a controlled burn at Awendaw Savanna, located near McClellanville, South Carolina.
... Controlled burn at Awendaw Savanna [07]](../../../i/upload/2025/01/15/20250115001936-68b82844-cu_s9999x250.jpg)
-
Controlled burn at Awendaw Savanna [08]
![Controlled burn at Awendaw Savanna [08] (778 visits) Controlled burn at Awendaw Savanna, located near McClellanville, South Carolina. I do not know why ... Controlled burn at Awendaw Savanna [08]](../../../i/upload/2025/01/15/20250115001942-4748472d-cu_s9999x250.jpg)
-
Controlled burn at Awendaw Savanna [09]
![Controlled burn at Awendaw Savanna [09] (737 visits) Controlled burn at Awendaw Savanna, located near McClellanville, South Carolina.
The US Forest Se... Controlled burn at Awendaw Savanna [09]](../../../i/upload/2025/01/15/20250115001947-2f56dbb9-cu_s9999x250.jpg)
-
Controlled burn at Awendaw Savanna [10]
![Controlled burn at Awendaw Savanna [10] (732 visits) Controlled burn at Awendaw Savanna, located near McClellanville, South Carolina.
The US Forest Se... Controlled burn at Awendaw Savanna [10]](../../../i/upload/2025/01/15/20250115001954-7c20a4fc-cu_s9999x250.jpg)
-
Controlled burn at Awendaw Savanna [11]
![Controlled burn at Awendaw Savanna [11] (734 visits) Controlled burn at Awendaw Savanna, located near McClellanville, South Carolina.
The US Forest Se... Controlled burn at Awendaw Savanna [11]](../../../i/upload/2025/01/15/20250115002000-47eb0859-cu_s9999x250.jpg)
-
Controlled burn at Awendaw Savanna [12]
![Controlled burn at Awendaw Savanna [12] (719 visits) Controlled burn at Awendaw Savanna, located near McClellanville, South Carolina.
The US Forest Se... Controlled burn at Awendaw Savanna [12]](../../../i/upload/2025/01/15/20250115002008-ca014c95-cu_s9999x250.jpg)
-
Controlled burn at Awendaw Savanna [13]
![Controlled burn at Awendaw Savanna [13] (729 visits) Controlled burn at Awendaw Savanna, located near McClellanville, South Carolina.
The US Forest Se... Controlled burn at Awendaw Savanna [13]](../../../i/upload/2025/01/15/20250115002013-8f88dc2a-cu_s9999x250.jpg)
-
Controlled burn at Awendaw Savanna [14]
![Controlled burn at Awendaw Savanna [14] (715 visits) Controlled burn at Awendaw Savanna, located near McClellanville, South Carolina.
The US Forest Se... Controlled burn at Awendaw Savanna [14]](../../../i/upload/2025/01/15/20250115002019-fb54fbe0-cu_s9999x250.jpg)
-
Controlled burn at Awendaw Savanna [15]
![Controlled burn at Awendaw Savanna [15] (743 visits) Controlled burn at Awendaw Savanna, located near McClellanville, South Carolina.
The US Forest Se... Controlled burn at Awendaw Savanna [15]](../../../i/upload/2025/01/15/20250115002025-6f363341-cu_s9999x250.jpg)
-
Controlled burn at Awendaw Savanna [16]
![Controlled burn at Awendaw Savanna [16] (2048 visits) "Road closed" sign on Duffield Road ahead of a controlled burn at Awendaw Savanna, located... Controlled burn at Awendaw Savanna [16]](../../../i/upload/2025/01/15/20250115002036-a74b5dfb-cu_s9999x250.jpg)
-
Controlled burn at Awendaw Savanna [17]
![Controlled burn at Awendaw Savanna [17] (1782 visits) Elyse Horvath walks along Duffield Road, photographing a controlled burn at Awendaw Savanna, located... Controlled burn at Awendaw Savanna [17]](../../../i/upload/2025/01/15/20250115002042-f4aea27f-cu_s9999x250.jpg)
-
Controlled burn at Awendaw Savanna [18]
![Controlled burn at Awendaw Savanna [18] (1770 visits) Elyse Horvath walks along Duffield Road, photographing a controlled burn at Awendaw Savanna, located... Controlled burn at Awendaw Savanna [18]](../../../i/upload/2025/01/15/20250115002048-b6c44169-cu_s9999x250.jpg)
![District of Columbia War Memorial [01] (1641 visits) The District of Columbia War Memorial, on the National Mall in Washington, DC.
Ben Schumin is a pro... District of Columbia War Memorial [01]](../../../i/upload/2024/07/13/20240713230603-9d9addb8-cu_s9999x250.jpg)
![Anti-Nazi protest [11] (9512 visits) A row of Capitol Police officers in riot gear forms a boundary between the counter-protesters and th... Anti-Nazi protest [11]](../../../i/upload/2024/07/15/20240715214437-fbcf0587-cu_s9999x250.jpg)
![Anti-Nazi protest [10] (3940 visits) A masked woman takes a photo at a demonstration on April 19, 2008 in Washington, DC where mostly lef... Anti-Nazi protest [10]](../../../i/upload/2024/07/15/20240715214439-63d920de-cu_s9999x250.jpg)
![Anti-Nazi protest [09] (9318 visits) Demonstrators protest a neo-Nazi demonstration on the Capitol grounds on April 19, 2008 in Washingto... Anti-Nazi protest [09]](../../../i/upload/2024/07/15/20240715214441-eb6c3d6e-cu_s9999x250.jpg)

![Washington Monument in scaffolding, viewed from a field west of 15th Street SW [01] (3588 visits) The Washington Monument, a stone obelisk erected to commemorate President George Washington, was clo... Washington Monument in scaffolding, viewed from a field west of 15th Street SW [01]](../../../i/upload/2024/07/17/20240717161954-a645a742-cu_s9999x250.jpg)
![Washington Monument in scaffolding, viewed from a field west of 15th Street SW [02] (3496 visits) The Washington Monument, a stone obelisk erected to commemorate President George Washington, was clo... Washington Monument in scaffolding, viewed from a field west of 15th Street SW [02]](../../../i/upload/2024/07/17/20240717161957-eaefa38c-cu_s9999x250.jpg)
![Washington Monument in scaffolding, viewed from the southwest [01] (2954 visits) The Washington Monument, a stone obelisk erected to commemorate President George Washington, was clo... Washington Monument in scaffolding, viewed from the southwest [01]](../../../i/upload/2024/07/17/20240717162040-a816357e-cu_s9999x250.jpg)
![Washington Monument in scaffolding, viewed from the southwest [02] (2659 visits) The Washington Monument, a stone obelisk erected to commemorate President George Washington, was clo... Washington Monument in scaffolding, viewed from the southwest [02]](../../../i/upload/2024/07/17/20240717162045-4adfa69d-cu_s9999x250.jpg)
![Washington Monument in scaffolding, viewed from the southwest [03] (2549 visits) The Washington Monument, a stone obelisk erected to commemorate President George Washington, was clo... Washington Monument in scaffolding, viewed from the southwest [03]](../../../i/upload/2024/07/17/20240717162048-de074947-cu_s9999x250.jpg)
![Washington Monument in scaffolding, viewed from the southwest [04] (3290 visits) The Washington Monument, a stone obelisk erected to commemorate President George Washington, was clo... Washington Monument in scaffolding, viewed from the southwest [04]](../../../i/upload/2024/07/17/20240717162051-682e904a-cu_s9999x250.jpg)
![Washington Monument in scaffolding, viewed from the southeast [01] (3222 visits) The Washington Monument, a stone obelisk erected to commemorate President George Washington, was clo... Washington Monument in scaffolding, viewed from the southeast [01]](../../../i/upload/2024/07/17/20240717162054-edb5ac0f-cu_s9999x250.jpg)
![Washington Monument in scaffolding, viewed from the southeast [02] (3311 visits) The Washington Monument, a stone obelisk erected to commemorate President George Washington, was clo... Washington Monument in scaffolding, viewed from the southeast [02]](../../../i/upload/2024/07/17/20240717162056-e1f94bec-cu_s9999x250.jpg)
![Washington Monument in scaffolding, viewed from the southeast [03] (3824 visits) The Washington Monument, a stone obelisk erected to commemorate President George Washington, was clo... Washington Monument in scaffolding, viewed from the southeast [03]](../../../i/upload/2024/07/17/20240717162059-d67ffec0-cu_s9999x250.jpg)
![Washington Monument in scaffolding, viewed from the southeast [04] (4516 visits) The Washington Monument, a stone obelisk erected to commemorate President George Washington, was clo... Washington Monument in scaffolding, viewed from the southeast [04]](../../../i/upload/2024/07/17/20240717162102-f639141e-cu_s9999x250.jpg)
![Base of the Washington Monument in scaffolding, viewed from the southwest [01] (2168 visits) The Washington Monument, a stone obelisk erected to commemorate President George Washington, was clo... Base of the Washington Monument in scaffolding, viewed from the southwest [01]](../../../i/upload/2024/07/17/20240717162110-6003aec3-cu_s9999x250.jpg)
![Base of the Washington Monument in scaffolding, viewed from the southwest [02] (1987 visits) The Washington Monument, a stone obelisk erected to commemorate President George Washington, was clo... Base of the Washington Monument in scaffolding, viewed from the southwest [02]](../../../i/upload/2024/07/17/20240717162113-c0c786ab-cu_s9999x250.jpg)
![Base of the Washington Monument in scaffolding, viewed from the southwest [03] (1953 visits) The Washington Monument, a stone obelisk erected to commemorate President George Washington, was clo... Base of the Washington Monument in scaffolding, viewed from the southwest [03]](../../../i/upload/2024/07/17/20240717162116-3eda0214-cu_s9999x250.jpg)
![Base of the Washington Monument in scaffolding, viewed from the southeast [01] (2545 visits) The Washington Monument, a stone obelisk erected to commemorate President George Washington, was clo... Base of the Washington Monument in scaffolding, viewed from the southeast [01]](../../../i/upload/2024/07/17/20240717162119-9fed4d23-cu_s9999x250.jpg)
![Base of the Washington Monument in scaffolding, viewed from the southeast [02] (2035 visits) The Washington Monument, a stone obelisk erected to commemorate President George Washington, was clo... Base of the Washington Monument in scaffolding, viewed from the southeast [02]](../../../i/upload/2024/07/17/20240717162122-68e67036-cu_s9999x250.jpg)
![Detail of the Washington Monument's scaffolding, viewed from the southwest [01] (2120 visits) The Washington Monument, a stone obelisk erected to commemorate President George Washington, was clo... Detail of the Washington Monument's scaffolding, viewed from the southwest [01]](../../../i/upload/2024/07/17/20240717162127-e8e4c500-cu_s9999x250.jpg)
![Detail of the Washington Monument's scaffolding, viewed from the southwest, showing the elevator car [01] (2913 visits) The Washington Monument, a stone obelisk erected to commemorate President George Washington, was clo... Detail of the Washington Monument's scaffolding, viewed from the southwest, showing the elevator car [01]](../../../i/upload/2024/07/17/20240717162135-3a1fcbfb-cu_s9999x250.jpg)
![Detail of the Washington Monument's scaffolding, viewed from the southwest, showing the elevator car [02] (3190 visits) The Washington Monument, a stone obelisk erected to commemorate President George Washington, was clo... Detail of the Washington Monument's scaffolding, viewed from the southwest, showing the elevator car [02]](../../../i/upload/2024/07/17/20240717162137-e6d3cce8-cu_s9999x250.jpg)
![Detail of the Washington Monument's scaffolding, viewed from the southwest, showing the elevator car [03] (3098 visits) The Washington Monument, a stone obelisk erected to commemorate President George Washington, was clo... Detail of the Washington Monument's scaffolding, viewed from the southwest, showing the elevator car [03]](../../../i/upload/2024/07/17/20240717162140-b66bbabb-cu_s9999x250.jpg)
![Detail of the Washington Monument's scaffolding, viewed from the southwest [02] (2593 visits) The Washington Monument, a stone obelisk erected to commemorate President George Washington, was clo... Detail of the Washington Monument's scaffolding, viewed from the southwest [02]](../../../i/upload/2024/07/17/20240717162148-c6ccb166-cu_s9999x250.jpg)
![Detail of the Washington Monument's scaffolding, viewed from the south [01] (2501 visits) The Washington Monument, a stone obelisk erected to commemorate President George Washington, was clo... Detail of the Washington Monument's scaffolding, viewed from the south [01]](../../../i/upload/2024/07/17/20240717162151-fdc2434b-cu_s9999x250.jpg)
![Detail of the Washington Monument's scaffolding, viewed from the south [02] (2279 visits) The Washington Monument, a stone obelisk erected to commemorate President George Washington, was clo... Detail of the Washington Monument's scaffolding, viewed from the south [02]](../../../i/upload/2024/07/17/20240717162154-8d23a49f-cu_s9999x250.jpg)
![Detail of the Washington Monument's scaffolding, viewed from the south [03] (2470 visits) The Washington Monument, a stone obelisk erected to commemorate President George Washington, was clo... Detail of the Washington Monument's scaffolding, viewed from the south [03]](../../../i/upload/2024/07/17/20240717162156-dfbfddb6-cu_s9999x250.jpg)
![Detail of the Washington Monument's scaffolding, viewed from the south [04] (2298 visits) The Washington Monument, a stone obelisk erected to commemorate President George Washington, was clo... Detail of the Washington Monument's scaffolding, viewed from the south [04]](../../../i/upload/2024/07/17/20240717162159-b7fb59d6-cu_s9999x250.jpg)


![Washington Monument in scaffolding, viewed from the northeast [02] (1455 visits) The Washington Monument, a stone obelisk erected to commemorate President George Washington, was clo... Washington Monument in scaffolding, viewed from the northeast [02]](../../../i/upload/2024/07/17/20240717162239-80ecebdd-cu_s9999x250.jpg)
![Washington Monument in scaffolding at night, viewed from the southwest, across the Tidal Basin [01] (2535 visits) The Washington Monument, a stone obelisk erected to commemorate President George Washington, was clo... Washington Monument in scaffolding at night, viewed from the southwest, across the Tidal Basin [01]](../../../i/upload/2024/07/17/20240717165825-4f489be4-cu_s9999x250.jpg)
![Washington Monument in scaffolding at night, viewed from the southwest, across the Tidal Basin [02] (2314 visits) The Washington Monument, a stone obelisk erected to commemorate President George Washington, was clo... Washington Monument in scaffolding at night, viewed from the southwest, across the Tidal Basin [02]](../../../i/upload/2024/07/17/20240717165829-8f19089c-cu_s9999x250.jpg)
![Washington Monument in scaffolding at night, viewed from the southeast [01] (2346 visits) The Washington Monument, a stone obelisk erected to commemorate President George Washington, was clo... Washington Monument in scaffolding at night, viewed from the southeast [01]](../../../i/upload/2024/07/17/20240717165849-7e3d0d52-cu_s9999x250.jpg)
![Washington Monument in scaffolding at night, viewed from the south, across the Tidal Basin [01] (2498 visits) The Washington Monument, a stone obelisk erected to commemorate President George Washington, was clo... Washington Monument in scaffolding at night, viewed from the south, across the Tidal Basin [01]](../../../i/upload/2024/07/17/20240717165852-e025de57-cu_s9999x250.jpg)
![Washington Monument in scaffolding at night, viewed from the south, across the Tidal Basin [02] (1975 visits) The Washington Monument, a stone obelisk erected to commemorate President George Washington, was clo... Washington Monument in scaffolding at night, viewed from the south, across the Tidal Basin [02]](../../../i/upload/2024/07/17/20240717165859-5fc48e43-cu_s9999x250.jpg)
![Washington Monument in scaffolding at night, viewed from the south, across the Tidal Basin [03] (2884 visits) The Washington Monument, a stone obelisk erected to commemorate President George Washington, was clo... Washington Monument in scaffolding at night, viewed from the south, across the Tidal Basin [03]](../../../i/upload/2024/07/17/20240717165902-9583fa1d-cu_s9999x250.jpg)
![Washington Monument in scaffolding at night, viewed from the south, across the Tidal Basin [04] (2668 visits) The Washington Monument, a stone obelisk erected to commemorate President George Washington, was clo... Washington Monument in scaffolding at night, viewed from the south, across the Tidal Basin [04]](../../../i/upload/2024/07/17/20240717165904-9847e3cc-cu_s9999x250.jpg)
![Washington Monument in scaffolding at night, viewed from the south, across the Tidal Basin [05] (2031 visits) The Washington Monument, a stone obelisk erected to commemorate President George Washington, was clo... Washington Monument in scaffolding at night, viewed from the south, across the Tidal Basin [05]](../../../i/upload/2024/07/17/20240717165913-d7f7ba07-cu_s9999x250.jpg)
![Washington Monument in scaffolding at night, viewed from the southwest, across the Tidal Basin [03] (2559 visits) The Washington Monument, a stone obelisk erected to commemorate President George Washington, was clo... Washington Monument in scaffolding at night, viewed from the southwest, across the Tidal Basin [03]](../../../i/upload/2024/07/17/20240717165917-eb9e49eb-cu_s9999x250.jpg)
![Washington Monument in scaffolding at night, viewed from the southwest, across the Tidal Basin [04] (5166 visits) The Washington Monument, a stone obelisk erected to commemorate President George Washington, was clo... Washington Monument in scaffolding at night, viewed from the southwest, across the Tidal Basin [04]](../../../i/upload/2024/07/17/20240717165920-c090e746-cu_s9999x250.jpg)
![Washington Monument in scaffolding at night, viewed from the southeast [02] (3098 visits) The Washington Monument, a stone obelisk erected to commemorate President George Washington, was clo... Washington Monument in scaffolding at night, viewed from the southeast [02]](../../../i/upload/2024/07/17/20240717165949-7270b6c7-cu_s9999x250.jpg)
![Washington Monument in scaffolding at night, viewed from the southwest [01] (6948 visits) The Washington Monument, a stone obelisk erected to commemorate President George Washington, was clo... Washington Monument in scaffolding at night, viewed from the southwest [01]](../../../i/upload/2024/07/17/20240717165954-0afd4743-cu_s9999x250.jpg)
![Washington Monument in scaffolding at night, viewed from the southeast [02] (2473 visits) The Washington Monument, a stone obelisk erected to commemorate President George Washington, was clo... Washington Monument in scaffolding at night, viewed from the southeast [02]](../../../i/upload/2024/07/17/20240717170012-9dd24af5-cu_s9999x250.jpg)
![Washington Monument in scaffolding at night, viewed from the southwest [02] (2835 visits) The Washington Monument, a stone obelisk erected to commemorate President George Washington, was clo... Washington Monument in scaffolding at night, viewed from the southwest [02]](../../../i/upload/2024/07/17/20240717170028-96fc368d-cu_s9999x250.jpg)
![Jefferson Memorial from across the Tidal Basin [01] (1744 visits) The Jefferson Memorial, viewed from across the Tidal Basin, near the Martin Luther King, Jr. Memoria... Jefferson Memorial from across the Tidal Basin [01]](../../../i/upload/2024/07/17/20240717170037-e2ce065d-cu_s9999x250.jpg)
![Jefferson Memorial from across the Tidal Basin [02] (1494 visits) The Jefferson Memorial, viewed from Maine Avenue SW, across the Tidal Basin from the memorial itself... Jefferson Memorial from across the Tidal Basin [02]](../../../i/upload/2024/07/17/20240717170040-d8bbe7ff-cu_s9999x250.jpg)

![Road flare on Maine Avenue SW [01] (1592 visits) A road flare burns in the rightmost lane of Maine Avenue SW during the National Cherry Blossom Festi... Road flare on Maine Avenue SW [01]](../../../i/upload/2024/07/17/20240717225356-2886a729-cu_s9999x250.jpg)
![Road flare on Maine Avenue SW [02] (1572 visits) A road flare burns in the rightmost lane of Maine Avenue SW during the National Cherry Blossom Festi... Road flare on Maine Avenue SW [02]](../../../i/upload/2024/07/17/20240717225359-e216a1f4-cu_s9999x250.jpg)


![Afton Mountain, viewed from Rockfish Gap [01] (11649 visits) Afton Mountain, part of the Blue Ridge Mountains, viewed from above Rockfish Gap.
More at The Schum... Afton Mountain, viewed from Rockfish Gap [01]](../../../i/upload/2024/07/20/20240720111734-45b6cd77-cu_s9999x250.jpg)
![Afton Mountain, viewed from Rockfish Gap [02] (11560 visits) Afton Mountain, part of the Blue Ridge Mountains, viewed from above Rockfish Gap.
More at The Schum... Afton Mountain, viewed from Rockfish Gap [02]](../../../i/upload/2024/07/20/20240720111739-8e9f0558-cu_s9999x250.jpg)
![Controlled burn at Awendaw Savanna [01] (735 visits) Aerial view of a controlled burn at Awendaw Savanna, located near McClellanville, South Carolina.
... Controlled burn at Awendaw Savanna [01]](../../../i/upload/2025/01/15/20250115001851-ef0bbae9-cu_s9999x250.jpg)
![Controlled burn at Awendaw Savanna [02] (739 visits) Aerial view of a controlled burn at Awendaw Savanna, located near McClellanville, South Carolina.
... Controlled burn at Awendaw Savanna [02]](../../../i/upload/2025/01/15/20250115001904-4206ce4c-cu_s9999x250.jpg)
![Controlled burn at Awendaw Savanna [03] (744 visits) Aerial view of a controlled burn at Awendaw Savanna, located near McClellanville, South Carolina.
... Controlled burn at Awendaw Savanna [03]](../../../i/upload/2025/01/15/20250115001911-3cf2c7e5-cu_s9999x250.jpg)
![Controlled burn at Awendaw Savanna [04] (748 visits) Aerial view of a controlled burn at Awendaw Savanna, located near McClellanville, South Carolina.
... Controlled burn at Awendaw Savanna [04]](../../../i/upload/2025/01/15/20250115001917-b4d868ee-cu_s9999x250.jpg)
![Controlled burn at Awendaw Savanna [05] (728 visits) Aerial view of a controlled burn at Awendaw Savanna, located near McClellanville, South Carolina.
... Controlled burn at Awendaw Savanna [05]](../../../i/upload/2025/01/15/20250115001923-4d921d31-cu_s9999x250.jpg)
![Controlled burn at Awendaw Savanna [06] (747 visits) Aerial view of a controlled burn at Awendaw Savanna, located near McClellanville, South Carolina.
... Controlled burn at Awendaw Savanna [06]](../../../i/upload/2025/01/15/20250115001930-f2a0840d-cu_s9999x250.jpg)
![Controlled burn at Awendaw Savanna [07] (722 visits) Aerial view of a controlled burn at Awendaw Savanna, located near McClellanville, South Carolina.
... Controlled burn at Awendaw Savanna [07]](../../../i/upload/2025/01/15/20250115001936-68b82844-cu_s9999x250.jpg)
![Controlled burn at Awendaw Savanna [08] (778 visits) Controlled burn at Awendaw Savanna, located near McClellanville, South Carolina. I do not know why ... Controlled burn at Awendaw Savanna [08]](../../../i/upload/2025/01/15/20250115001942-4748472d-cu_s9999x250.jpg)
![Controlled burn at Awendaw Savanna [09] (737 visits) Controlled burn at Awendaw Savanna, located near McClellanville, South Carolina.
The US Forest Se... Controlled burn at Awendaw Savanna [09]](../../../i/upload/2025/01/15/20250115001947-2f56dbb9-cu_s9999x250.jpg)
![Controlled burn at Awendaw Savanna [10] (732 visits) Controlled burn at Awendaw Savanna, located near McClellanville, South Carolina.
The US Forest Se... Controlled burn at Awendaw Savanna [10]](../../../i/upload/2025/01/15/20250115001954-7c20a4fc-cu_s9999x250.jpg)
![Controlled burn at Awendaw Savanna [11] (734 visits) Controlled burn at Awendaw Savanna, located near McClellanville, South Carolina.
The US Forest Se... Controlled burn at Awendaw Savanna [11]](../../../i/upload/2025/01/15/20250115002000-47eb0859-cu_s9999x250.jpg)
![Controlled burn at Awendaw Savanna [12] (719 visits) Controlled burn at Awendaw Savanna, located near McClellanville, South Carolina.
The US Forest Se... Controlled burn at Awendaw Savanna [12]](../../../i/upload/2025/01/15/20250115002008-ca014c95-cu_s9999x250.jpg)
![Controlled burn at Awendaw Savanna [13] (729 visits) Controlled burn at Awendaw Savanna, located near McClellanville, South Carolina.
The US Forest Se... Controlled burn at Awendaw Savanna [13]](../../../i/upload/2025/01/15/20250115002013-8f88dc2a-cu_s9999x250.jpg)
![Controlled burn at Awendaw Savanna [14] (715 visits) Controlled burn at Awendaw Savanna, located near McClellanville, South Carolina.
The US Forest Se... Controlled burn at Awendaw Savanna [14]](../../../i/upload/2025/01/15/20250115002019-fb54fbe0-cu_s9999x250.jpg)
![Controlled burn at Awendaw Savanna [15] (743 visits) Controlled burn at Awendaw Savanna, located near McClellanville, South Carolina.
The US Forest Se... Controlled burn at Awendaw Savanna [15]](../../../i/upload/2025/01/15/20250115002025-6f363341-cu_s9999x250.jpg)
![Controlled burn at Awendaw Savanna [16] (2048 visits) "Road closed" sign on Duffield Road ahead of a controlled burn at Awendaw Savanna, located... Controlled burn at Awendaw Savanna [16]](../../../i/upload/2025/01/15/20250115002036-a74b5dfb-cu_s9999x250.jpg)
![Controlled burn at Awendaw Savanna [17] (1782 visits) Elyse Horvath walks along Duffield Road, photographing a controlled burn at Awendaw Savanna, located... Controlled burn at Awendaw Savanna [17]](../../../i/upload/2025/01/15/20250115002042-f4aea27f-cu_s9999x250.jpg)
![Controlled burn at Awendaw Savanna [18] (1770 visits) Elyse Horvath walks along Duffield Road, photographing a controlled burn at Awendaw Savanna, located... Controlled burn at Awendaw Savanna [18]](../../../i/upload/2025/01/15/20250115002048-b6c44169-cu_s9999x250.jpg)